Scrape Books from URL with Dumpling AI, Clean HTML, Save to Sheets, Email as CSV
Introduction
Imagine getting the latest book listings from an online bookstore automatically, without ever needing to manually copy and paste. This automation does exactly that. By combining n8n, Dumpling AI, and Google Sheets, you can scrape book titles and prices from a webpage, clean the messy HTML into structured data, save it nicely into Google Sheets, and send the data straight to your email as a CSV file.
Why is this automation powerful?
- It saves hours of manual work by scraping hundreds of book entries in seconds.
- It ensures clean, organized data that can be used immediately.
- It sends you a ready-to-use CSV file, perfect for reports, analysis, or inventory updates.
Now, let’s get into building this powerful workflow, step-by-step.
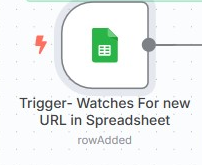
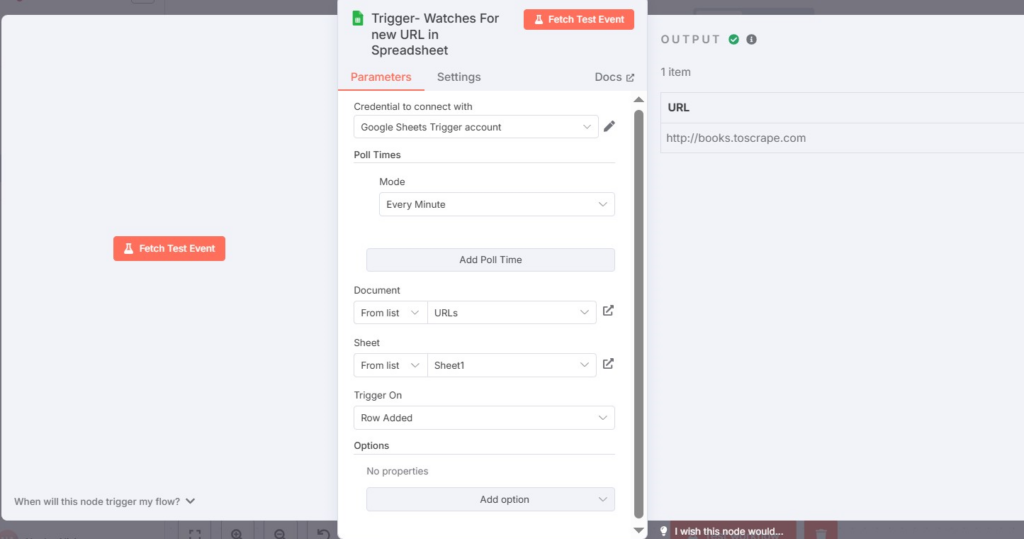
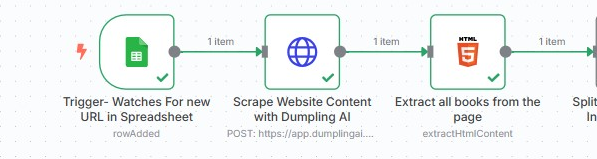
Step 1: Set Up the Trigger to Watch New URLs in Google Sheets
In n8n, we start by setting up a trigger that watches a specific Google Sheets document. Whenever a new URL is added, the automation starts.
- Add a Google Sheets Trigger node.
- Connect your Google account.
- Configure it to monitor a specific document and sheet.
- Set the event to rowAdded.
Settings Example:
- Document ID: Your Google Sheets link.
- Sheet Name: Usually “Sheet1” unless renamed.
Output:
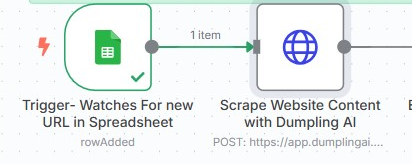
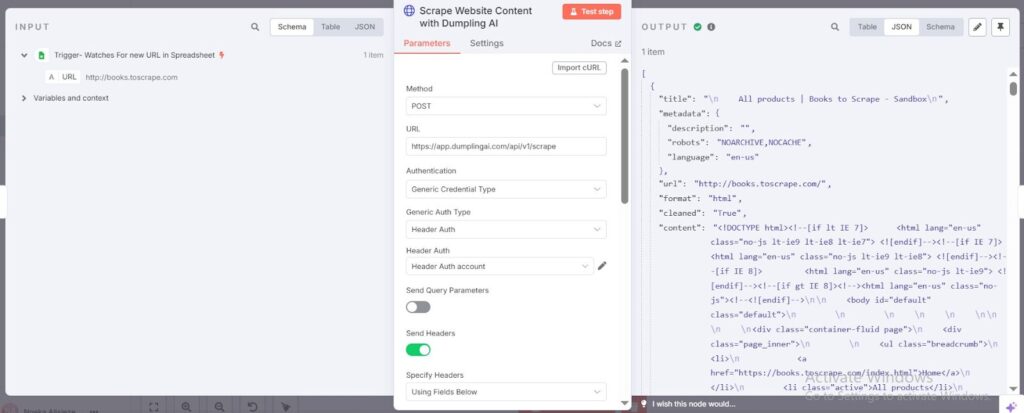
Step 2: Fetch the Website Content Using Dumpling AI
Once a URL is detected, Dumpling AI will be used to scrape the full HTML content of that webpage. Dumpling AI is fast, clean, and much easier than setting up your own scrapers.
How to do it:
- Add an HTTP Request node.
- Set the Method to POST.
- Enter the URL: https://app.dumplingai.com/api/v1/scrape
- Use HTTP Header Authentication to connect your Dumpling AI credentials.
- In the body of the request, send the URL from the previous Google Sheets step, and request cleaned HTML.
Example of JSON Body:
{
“url”: “{{ $(‘Trigger- Watches For new URL in Spreadsheet’) }}”,
“format”: “html”,
“cleaned”: “True”
}
HTTP Output:
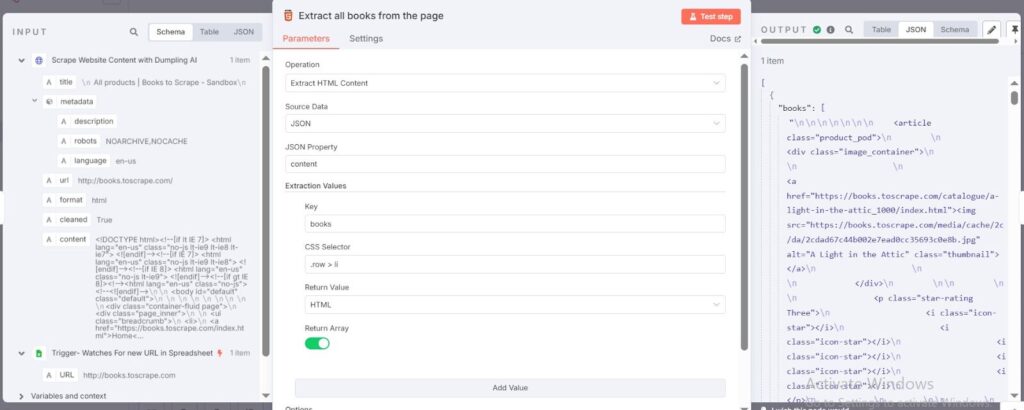
Step 3: Extract All Books from the Scraped Page
What is happening here:
We now have a full HTML page. Instead of trying to parse the whole page, we only want the parts that list each book.
How to do it:
- Add an HTML Extract node.
- Set Data Property Name to content (which came from the previous HTTP node).
- Add an Extraction Value:
- Key: books
- CSS Selector: .row > li
- Return: HTML
- Return Array: Yes
- Key: books
Detailed Tip:
If you are unsure about CSS selectors, right-click any element on a web page and click Inspect. Then copy its selector.
HTML output:
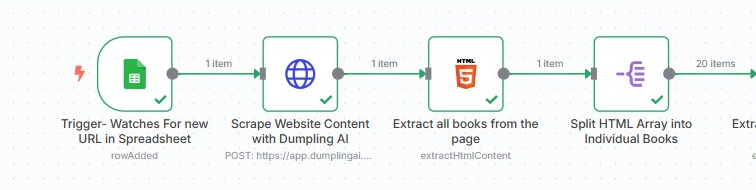
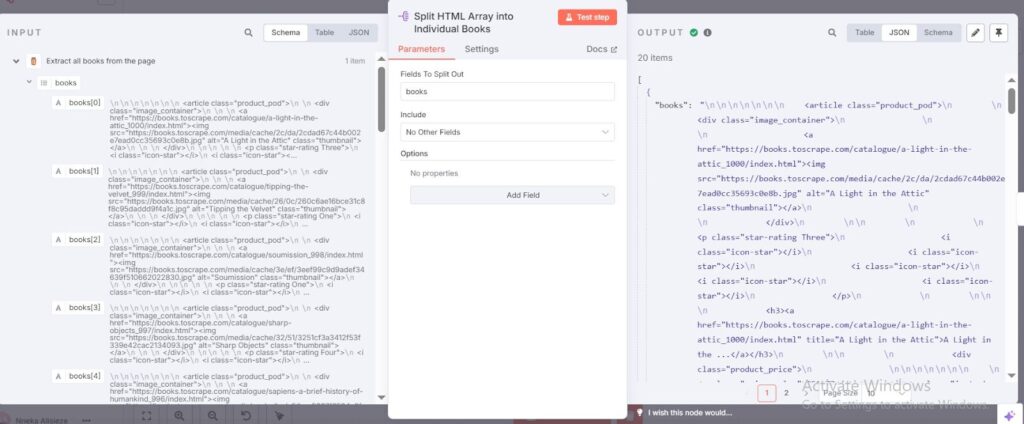
Step 4: Split the Array into Individual Book Entries
What is happening here:
After extracting all the books as an array, we need to work with each book one at a time to properly pull the title and price.
How to do it:
- Add a Split Out node.
- Choose the field to split as books.
Detailed Tip:
Think of this like unstacking a box of books, laying them out one by one for easier handling.
Split Output:
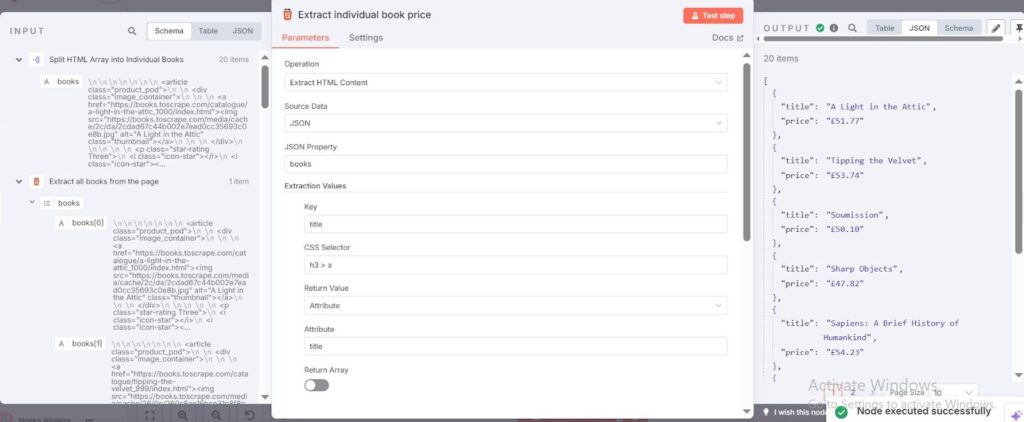
Step 5: Extract the Book Title and Price
Each book’s HTML is still messy. We now extract only the specific parts we want — the book title and the book price.
How to do it:
- Add another HTML Extract node.
- Set Data Property Name to books.
- Add two Extraction Values:
- Key: title
- CSS Selector: h3 > a
- Return: Attribute
- Attribute: title
- CSS Selector: h3 > a
- Key: price
- CSS Selector: .price_color
- Return: Text Content
- CSS Selector: .price_color
- Key: title
Detailed Tip:
Always double-check if you are pulling the attribute (like “title”) or the text content from the HTML tag. Mixing them up can break your data.

HTML Output:
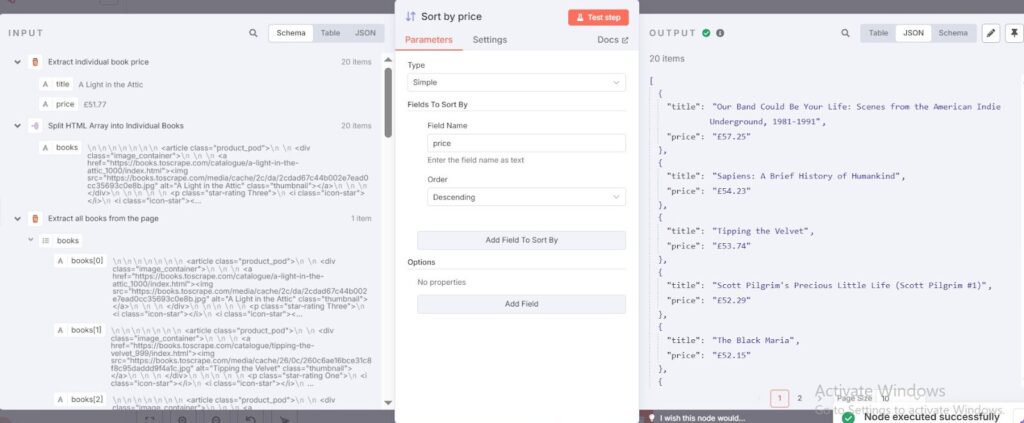
Step 6: Sort the Books by Price
Now that you have a clean list of books with their prices, you can sort them in order. This makes your final CSV organized.
How to do it:
- Add a Sort node.
- Choose to sort by the field price.
- Choose Descending if you want expensive books first, or Ascending if you want cheap books first.
Detailed Tip:
Sorting at this stage ensures your email attachment is neat and more professional.

SortByPrice Output:
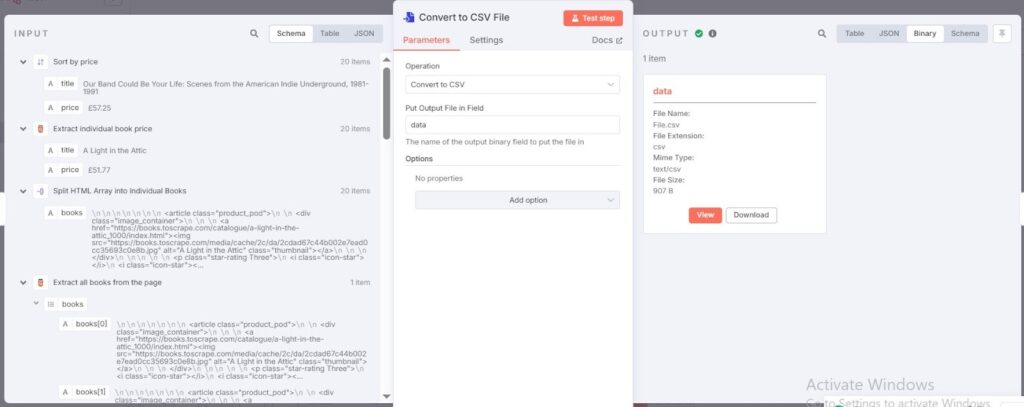
Step 7: Convert the Data into a CSV File
You now have a neat list of books and prices inside n8n. But we want to package it into a file format anyone can open — a CSV.
How to do it:
- Add a Convert to File node.
- Choose the type: CSV.
Detailed Tip:
CSV files can be opened in Excel, Google Sheets, Airtable, and almost any other data platform. Always use CSV for maximum flexibility.

CSV Output:
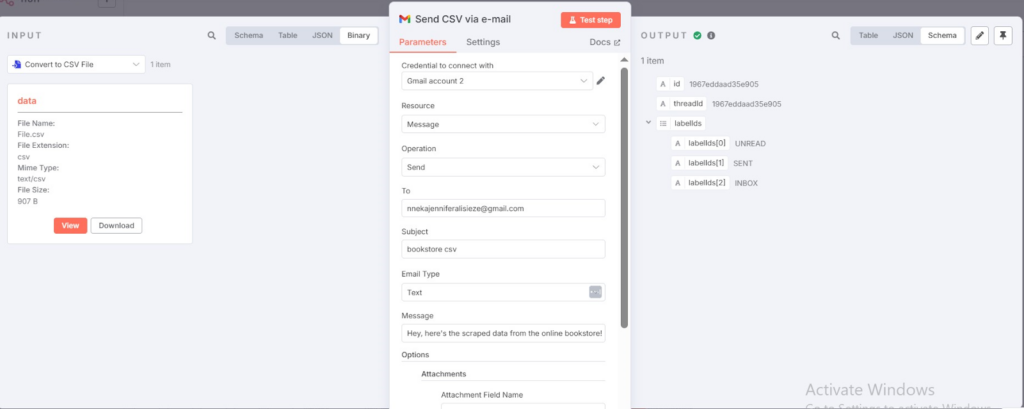
Step 8: Email the CSV File Automatically
What is happening here:
Instead of manually downloading and sending the CSV, n8n will now automatically send you an email with the CSV attached.
How to do it:
- Add a Gmail node.
- Connect your Gmail account using OAuth.
- Set up:
- Send To: Your email address
- Subject: “Bookstore CSV”
- Body: A simple message like “Hey, here is the scraped data!”
- Attachment: Use the binary file output from the previous step.
- Send To: Your email address
Detailed Tip:
You can schedule multiple recipients, or even dynamically send it to different users based on a field in your spreadsheet!

Email Output:
Conclusion
This automation is a great example of how you can combine tools to build a smooth, efficient system without writing a single line of code.
It not only scrapes but cleans, organizes, and delivers the data ready for immediate use.
Benefits you gain with this setup:
- No manual scraping or formatting ever again
- Faster decision-making with up-to-date information
- Error-free and consistent data structure
- Saves a lot of time for businesses needing frequent product monitoring
Pro Tip:
Once you are comfortable with this workflow, you can expand it. For example:
- Upload the CSV to Dropbox
- Insert scraped books directly into a database
- Send real-time notifications to Slack or Microsoft Teams
- Run weekly or daily scraping schedules automatically
Automation like this gives you real control over your data workflows — turning boring repetitive tasks into efficient background systems.
Download the blueprint used in this blog post
Click here to access the blueprint. Whether you’re just starting out or looking to refine your AI Automation skills, our community has got the tools and support to help you succeed.


